how to paint furniture
Transforming a tired piece of furniture with a fresh coat of paint is one of the most satisfying and cost-effective ways to update your home decor. Whether you’ve found a diamond in the rough at a thrift store, inherited a piece that doesn’t quite match your style, or simply want to refresh an existing item, learning how to paint furniture opens up a world of creative possibilities. This comprehensive guide will walk you through every step of the process, from meticulous preparation and choosing the perfect furniture paint to mastering various furniture painting techniques and adding those crucial finishing touches. We’ll cover everything a beginner needs to know, delve into advanced methods like distressing furniture and whitewashing furniture, and provide specific tips for projects like how to paint kitchen furniture and how to paint metal furniture. Get ready to embark on rewarding diy furniture projects and give your furnishings a stunning furniture makeover. This is your ultimate resource for achieving professional-looking results, covering everything from how to paint furniture for beginners to tips on how to paint furniture like a pro. Let’s unlock the secrets to beautifully painted furniture.
Preparing Furniture for Painting: The Crucial First Step
Ask any professional painter, and they’ll tell you the secret to a flawless finish lies not just in the application, but overwhelmingly in the preparation. Skipping or rushing these initial steps is the most common mistake beginners make, often leading to peeling paint, poor adhesion, and an uneven surface. Proper preparation ensures your chosen furniture paint adheres correctly, looks smooth, and stands the test of time. It might seem tedious, but investing time here saves frustration later and is fundamental to learning how to paint furniture effectively. This stage involves cleaning the piece thoroughly and, usually, sanding it to create the ideal surface for the paint to grip onto. Think of it as creating the perfect canvas for your furniture makeover. Whether you’re tackling how to paint wood furniture, laminate, or metal, preparation is non-negotiable for quality furniture refinishing or painting.
Cleaning Your Furniture Thoroughly
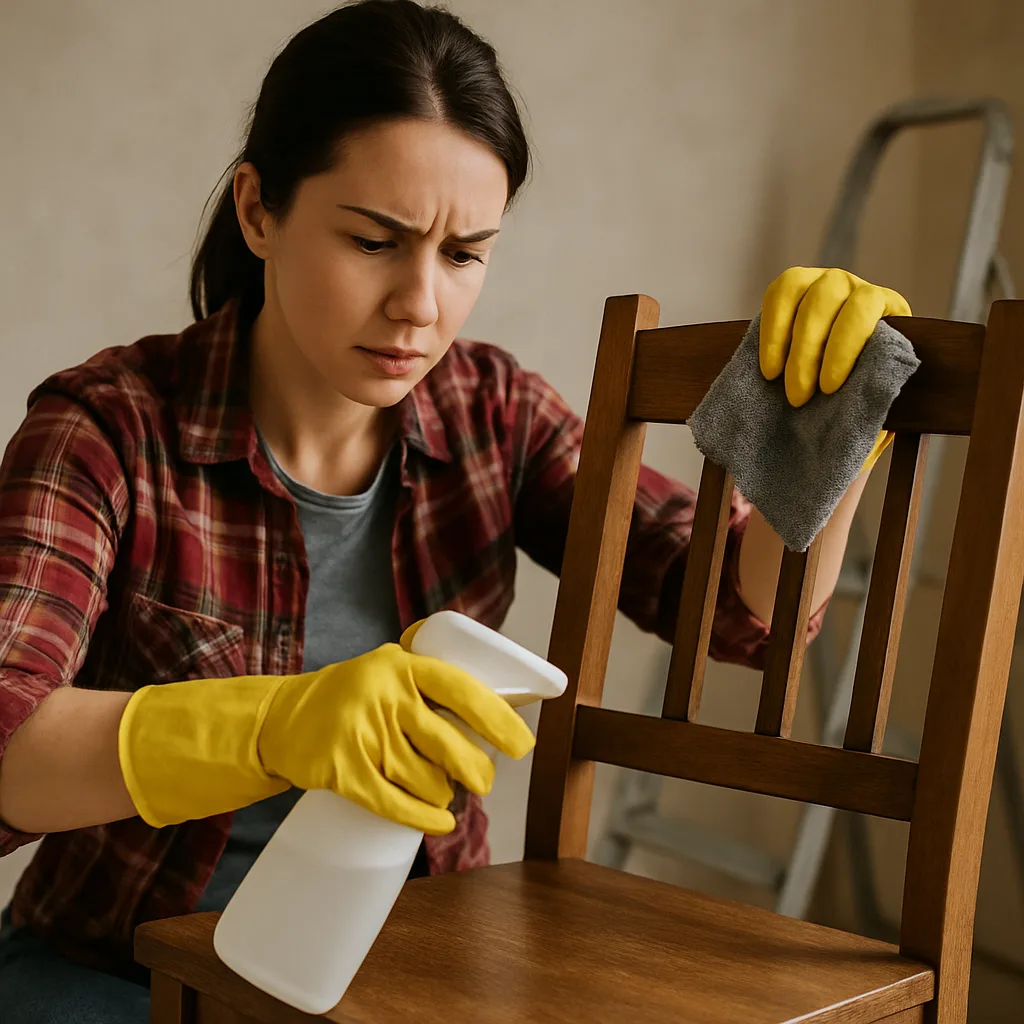
Furniture, especially older pieces or those used in kitchens and dining areas, accumulates layers of dirt, grime, grease, oils from hands, and residues from cleaning products or waxes. Paint simply will not stick properly to a dirty or greasy surface. Therefore, the absolute first step in any furniture painting project is a deep clean.
Start by dusting the piece thoroughly, getting into corners and crevices. A vacuum cleaner with a brush attachment works well for intricate details. Next, you need a degreasing cleaner. For most wood or painted surfaces, a solution of warm water and a mild detergent (like dish soap) can work, but for tougher grime or kitchen pieces, a dedicated degreaser is often better. Products like TSP (Trisodium Phosphate) or TSP substitute are highly effective, but be sure to follow the manufacturer’s instructions carefully and wear protective gloves and eyewear, ensuring good ventilation.
Scrub the entire piece using a sponge or cloth dampened with your cleaning solution. Pay extra attention to areas that are frequently touched, like drawer fronts, knobs, tabletops, and chair arms. Use an old toothbrush or a small scrub brush to get into detailed carvings or joints. After scrubbing, rinse the furniture thoroughly with clean water. Use a clean, damp cloth to wipe away all soap or cleaner residue. Leaving residue behind can interfere with paint adhesion just as much as the original grime.
Finally, allow the furniture to dry completely. This might take several hours or even overnight, depending on the humidity and temperature. Ensure the piece is bone dry before proceeding to the next step, especially if you’re working with wood, as moisture can cause issues with swelling or paint failure later. This cleaning step is vital whether you’re planning on traditional painting, chalk painting furniture, or even attempting how to paint furniture without sanding. A clean surface is always paramount.
Sanding Furniture (Including How to Paint Furniture Without Sanding)
Sanding is typically the next crucial preparation step after cleaning and drying. Its primary purposes are to smooth out imperfections in the existing surface and, more importantly, to create a slightly roughened texture, known as ‘tooth,’ which helps the primer and paint adhere much more effectively. Sanding removes the gloss from previous finishes, scuffs up smooth surfaces like laminate or melamine, and levels minor scratches or dents.
For most furniture painting projects, especially those involving wood (how to paint wood furniture, how to paint wooden furniture) or pieces with an existing glossy finish, sanding is highly recommended. Start with medium-grit sandpaper (around 100-150 grit) to remove gloss and smooth imperfections. Work in the direction of the wood grain if applicable. Apply even pressure, but don’t oversand, especially on veneers, which are very thin. An orbital sander can speed up the process on flat surfaces, but you’ll likely need sanding sponges or sheets of sandpaper for curved areas, legs, and details.
After the initial sanding, follow up with fine-grit sandpaper (around 180-220 grit) to create a super smooth surface ready for priming or painting. Again, sand lightly with the grain.
Once sanding is complete, removing all the sanding dust is absolutely critical. Any dust left behind will mix with your paint, creating a gritty, unprofessional texture. Use a vacuum cleaner with a brush attachment first, then wipe the entire piece down meticulously with a tack cloth. A tack cloth is a slightly sticky cheesecloth designed specifically to pick up fine dust particles that regular cloths might miss. Repeat this process until the surface feels perfectly smooth and clean to the touch.
Now, what about the popular query: how to paint furniture without sanding? It’s true that under certain circumstances and with specific products, you can minimize or even skip the sanding step. This is particularly appealing for intricate pieces where sanding would be difficult or for those looking for a quicker furniture makeover.
Tips for Painting Furniture Without Sanding
While sanding generally yields the best, most durable results, there are situations and products that allow you to bypass this often dusty step. Learning how to paint furniture without sanding involves choosing the right products and understanding the limitations.
The most common scenario for skipping sanding is when using chalk paint or some types of mineral paint. These paints are specifically formulated with additives that enhance adhesion to various surfaces, including previously finished or even slightly glossy ones. This is a major reason for the popularity of chalk painting furniture. However, even with chalk paint, a thorough cleaning is non-negotiable, and giving the surface a very light scuff with fine-grit sandpaper or a sanding sponge can still improve adhesion, especially on very slick surfaces. It’s not aggressive sanding, just a quick pass to break the surface tension.
Another approach is to use a liquid deglosser, sometimes called liquid sandpaper. This chemical product is wiped onto the existing finish to clean it and chemically etch the surface, creating microscopic grooves for the paint to grip onto. Follow the product instructions carefully, ensuring good ventilation and using appropriate safety gear. Deglossers work best on surfaces with existing paint or varnish; they may be less effective on raw wood or laminate.
Bonding primers are another key tool for painting without extensive sanding. These primers are designed to stick to difficult surfaces like gloss paint, varnish, laminate, melamine, and even tile or glass. After thoroughly cleaning the piece, apply a coat of high-quality bonding primer according to the manufacturer’s directions. Once the primer is dry, you can typically proceed with your chosen topcoat (like latex or acrylic paint), which will adhere well to the primer. This method allows you to use a wider range of furniture paint colors and finishes than relying solely on chalk paint.
Keep in mind the limitations: painting without sanding works best on pieces that are already in good condition, without peeling paint, deep scratches, or significant damage. If the existing finish is failing, sanding is usually necessary to remove the unstable layer. Furthermore, while these methods can work, the resulting finish might sometimes be slightly less durable over the long term compared to a traditionally sanded and prepped piece, especially in high-wear situations like tabletops or kitchen cabinets. Always weigh the convenience against the desired longevity and use case for your furniture project.
Choosing the Right Furniture Paint
With your furniture meticulously prepped, the exciting part begins: choosing the paint! The world of furniture paint is vast, offering different formulations, finishes, and an endless spectrum of colors. The right choice depends on the type of furniture, its intended use, the look you want to achieve, and your personal preference regarding application and durability. Understanding the options is key to a successful furniture diy project. From versatile latex paints to specialty options like chalk paint and milk paint, each has its pros and cons. We’ll explore popular types and delve into the fun part – selecting furniture paint colors and finding furniture paint ideas.

Exploring Furniture Paint Colors and Ideas
Choosing a color is often the most enjoyable, yet sometimes daunting, part of any furniture painting project. The possibilities are endless, from timeless neutrals to bold statement hues. Consider the room where the furniture will live – do you want it to blend in or stand out? Look at existing colors in the room’s textiles, walls, and other decor for inspiration.
Neutral colors like white, gray, and black are perennially popular choices for painted furniture. How to paint furniture white is a frequent search, as white paint can brighten a space and give pieces a fresh, clean look, fitting well with farmhouse, coastal, or minimalist styles. How to paint furniture gray is another versatile option, offering a sophisticated and modern feel that complements many color schemes. Gray can range from soft, light tones to deep charcoals. How to paint furniture black creates a dramatic, elegant, or modern statement, grounding a space and adding a touch of sophistication. Black works well on traditional pieces for a classic look or on modern pieces for a sleek finish.
Don’t be afraid to explore bolder furniture paint colors. Jewel tones like emerald green, sapphire blue, or deep ruby can turn a simple piece into a stunning focal point. Pastels can add a soft, vintage charm, while bright, saturated colors inject energy and personality. Consider the style you’re aiming for: blues and greens often evoke a calming feel, while reds and yellows are more energetic.
Look for furniture paint ideas online (Pinterest and Instagram are great resources), in home decor magazines, or even in nature. Think about techniques beyond solid colors – maybe two-toned effects (painting the body one color and the drawers another), geometric patterns, or subtle stenciling. Consider the furniture’s style; a sleek mid-century modern piece might look great in a bold teal or orange, while a traditional dresser could be stunning in a classic navy or creamy white.
When choosing, get paint samples if possible. Paint a small, inconspicuous area on the furniture or a piece of scrap wood to see how the color looks in your room’s lighting throughout the day. Remember that the paint’s sheen (matte, eggshell, satin, semi-gloss, gloss) will also affect the final appearance. Matte finishes hide imperfections well but can be less wipeable, while glossier finishes are more durable and easier to clean but highlight flaws. Satin or eggshell often provide a good balance for furniture.
Chalk Painting Furniture: A Beginner’s Guide
Chalk painting furniture has surged in popularity over the last decade, and for good reason. Often marketed as requiring minimal prep (sometimes aligning with the desire for how to paint furniture without sanding), it offers a distinctive velvety matte finish and is relatively easy for beginners to use. If you’re new to furniture painting, how to chalk paint furniture is an excellent starting point.
What is Chalk Paint? True “Chalk Paint” is a specific brand name (developed by Annie Sloan), but the term is now widely used to describe a type of decorative furniture paint known for its chalky, ultra-matte finish and excellent adhesion. These paints are typically water-based, low-VOC (Volatile Organic Compounds), and clean up easily with soap and water. They are different from chalkboard paint (which you can write on with chalk).
Why Use Chalk Paint?
- Adhesion: As mentioned, its main draw is its ability to adhere to many surfaces (wood, metal, laminate, previously painted or varnished items) often with minimal sanding. Thorough cleaning is still essential.
- Finish: It provides a unique, soft, velvety matte finish that is very forgiving and hides minor imperfections well.
- Ease of Use: It’s generally thick, provides good coverage, dries relatively quickly, and is easy to distress for vintage or shabby chic looks.
- Low Prep: Often reduces or eliminates the need for priming and extensive sanding, making diy painting furniture projects faster.
Considerations:
- Durability: By itself, chalk paint is not very durable and can be prone to scuffs and water marks. It almost always requires a top coat (typically wax or a water-based polycrylic) for protection, especially on high-use surfaces.
- Cost: Brand-name chalk paints can be more expensive per ounce than traditional latex or acrylic paints.
- Finish: The ultra-matte finish isn’t for everyone or every style. Achieving a smooth, non-textured finish can sometimes require specific techniques like slightly thinning the paint or using specific brushes.
How to paint furniture with chalk paint is a rewarding process, particularly suited for achieving rustic, vintage, or bohemian styles.
How to Chalk Paint Furniture Step by Step
Learning how to chalk paint furniture is straightforward. Here’s a step-by-step guide for beginners tackling their first chalk painting furniture project:
- Prep the Piece: Even if skipping sanding, clean the furniture thoroughly with a degreaser (as detailed in the cleaning section) and rinse well. Let it dry completely. Remove hardware (knobs, pulls) unless you plan to paint them too. Make any necessary repairs (fill holes, glue loose joints). If the surface is extremely glossy or slick (like laminate), a very light scuff sand with 220-grit paper can still improve adhesion, but isn’t always strictly necessary. Wipe away any dust with a tack cloth.
- Stir the Paint: Chalk paint often has solids that settle. Stir it extremely well before and during use, reaching the bottom of the can to incorporate all pigments and binders. Avoid shaking vigorously, as this can introduce air bubbles.
- Apply the First Coat: Use a brush designed for chalk paint (often natural or synthetic blend bristles) or a quality synthetic brush. Dip the brush lightly into the paint and apply it in smooth, even strokes. Chalk paint can be thick; don’t overload your brush. Work in manageable sections. The first coat might look patchy or streaky – this is normal. Don’t overwork the paint trying to perfect it. Let it dry completely according to the manufacturer’s instructions (chalk paint often dries quickly to the touch, but allow recommended recoat time).
- Apply Subsequent Coats: Apply a second coat in the same manner for full coverage. Some light colors or drastic color changes might require a third coat. Ensure each coat is fully dry before applying the next. Lightly sanding between coats with very fine (320+ grit) sandpaper can create an exceptionally smooth finish, but is optional. Wipe away dust after sanding.
- Distress (Optional): If you want a distressed look (how to paint furniture to look distressed), now is the time. Once the final paint coat is dry, use medium or fine-grit sandpaper (or a damp cloth – wet distressing) to gently rub away paint on edges, corners, and details where natural wear would occur. Start lightly; you can always remove more paint, but you can’t easily put it back. Wipe away dust.
- Seal the Paint: This is crucial for durability. The most traditional sealant for chalk paint is furniture wax (clear, dark, or colored). Apply clear wax using a wax brush or lint-free cloth in thin, even layers, working it into the paint like hand lotion. Wipe away excess wax with a clean cloth. Allow it to cure (harden) – this can take several days to weeks for full durability. For higher-wear surfaces like tabletops or kitchen cabinets, a water-based polycrylic or specialized durable topcoat might be a better choice than wax. Apply it according to the product directions, typically with a synthetic brush or foam applicator in thin coats.
- Reattach Hardware: Once the top coat is fully cured, reattach your cleaned or new hardware.
This process provides a solid foundation for anyone wondering how to paint furniture with chalk paint and achieve beautiful results on their furniture projects.
How to Paint Furniture: Essential Techniques
Beyond choosing the right paint, mastering the application technique is vital for achieving a professional finish. Whether you prefer the traditional feel of a brush or the sleek speed of a sprayer, understanding the nuances of each method will elevate your furniture painting skills. We’ll cover how to paint furniture with a brush to minimize strokes, the secrets to flawless spray painting furniture, and specific considerations for how to paint wood furniture. These techniques form the core of learning how to paint furniture like a pro.
How to Paint Furniture with a Brush Like a Pro
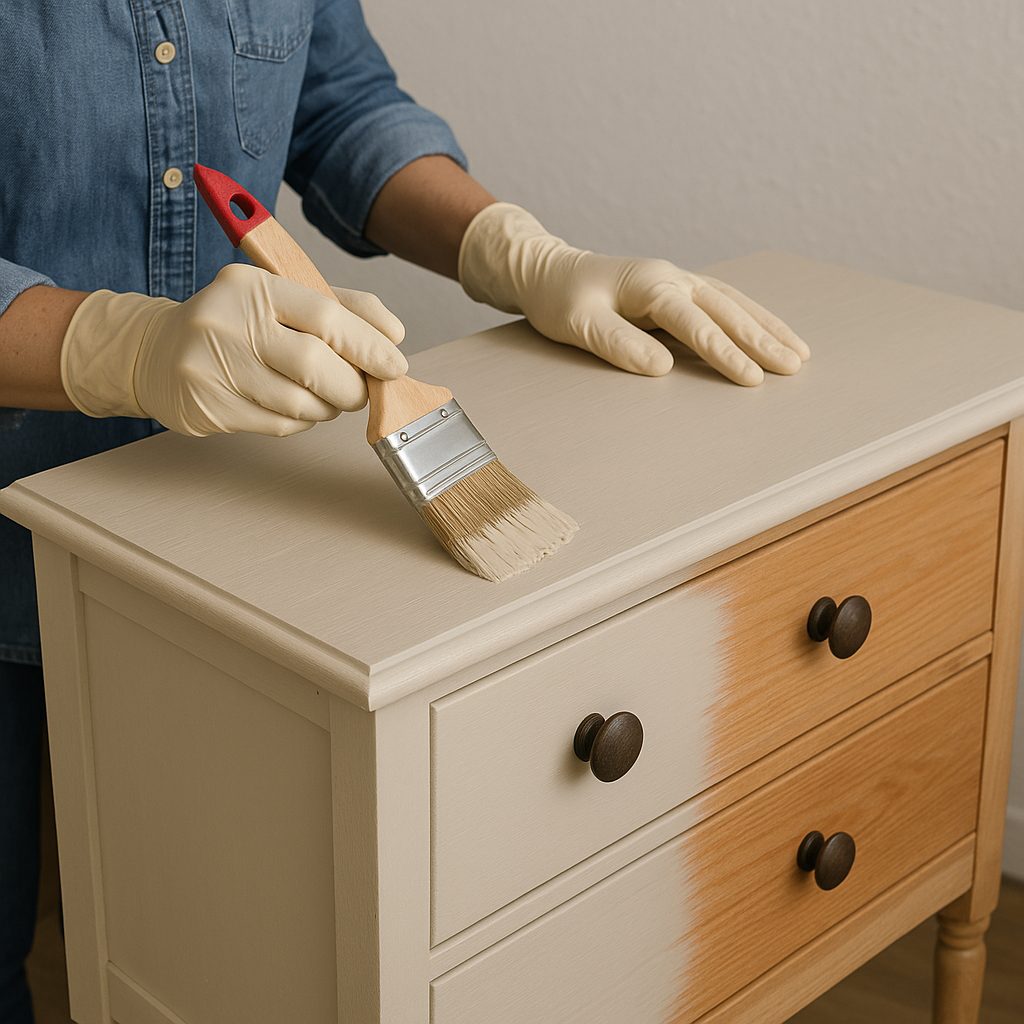
Brush painting is the most accessible method for diy painting furniture, requiring minimal equipment beyond paint and a good brush. However, achieving a smooth, stroke-free finish takes practice and attention to detail. Learning how to paint furniture with a brush effectively is a valuable skill for any furniture makeover.
- Choose the Right Brush: Don’t skimp on brushes. A high-quality brush holds more paint, releases it more evenly, and is less likely to shed bristles. For water-based paints (latex, acrylic, chalk paint), use a synthetic bristle brush (nylon, polyester, or a blend). Angled sash brushes are great for cutting in edges and details, while flat brushes work well for larger surfaces. For oil-based paints, natural bristle brushes (like china bristle) are often preferred. Ensure the brush is clean and dry before starting.
- Proper Paint Loading: Dip only the tip (about one-third to one-half) of the bristles into the paint. Tap the brush gently against the inside of the can or paint tray; don’t wipe it hard across the rim, as this removes too much paint and can cause paint to dry in the ferrule (the metal part). You want enough paint to flow smoothly but not so much that it drips.
- Application Technique – “Cutting In”: Start by painting edges, corners, and details first – this is called “cutting in.” Use the edge of your angled brush for precision.
- Application Technique – Flat Surfaces: On larger flat areas like tabletops or cabinet sides, apply paint in long, smooth, overlapping strokes. Work in the direction of the wood grain if painting wood. Apply enough pressure for the paint to release but not so much that the bristles fan out excessively.
- Maintain a Wet Edge: Try to work in sections, always brushing back into the previously painted wet area. This helps blend the sections together seamlessly and minimizes lap marks where wet paint meets drying paint. Work relatively quickly but deliberately.
- “Tipping Off”: After applying paint to a section, lightly glide the very tip of your brush (held at a low angle) across the entire length of the surface in one continuous stroke, again following the grain. This smooths out brush marks and ensures an even layer. Don’t apply pressure; just let the brush tips gently float over the wet paint.
- Avoid Overworking: Resist the temptation to keep brushing over an area as it starts to dry. This will pull the paint and create texture or streaks. Apply the paint, tip it off, and move on. If you miss a spot or see an imperfection, it’s usually best to let it dry completely and address it with the next coat or light sanding between coats.
- Multiple Thin Coats: Applying two or three thin coats is always better than one thick coat. Thin coats dry faster, level better, and result in a more durable, smoother finish. Allow proper drying time between coats as specified by the paint manufacturer. Lightly sand between coats (after drying) with very fine sandpaper (220-320 grit) and wipe clean with a tack cloth for the ultimate smooth finish.
Mastering these steps is key to learning how to paint furniture techniques with a brush and achieving results that rival professional jobs.
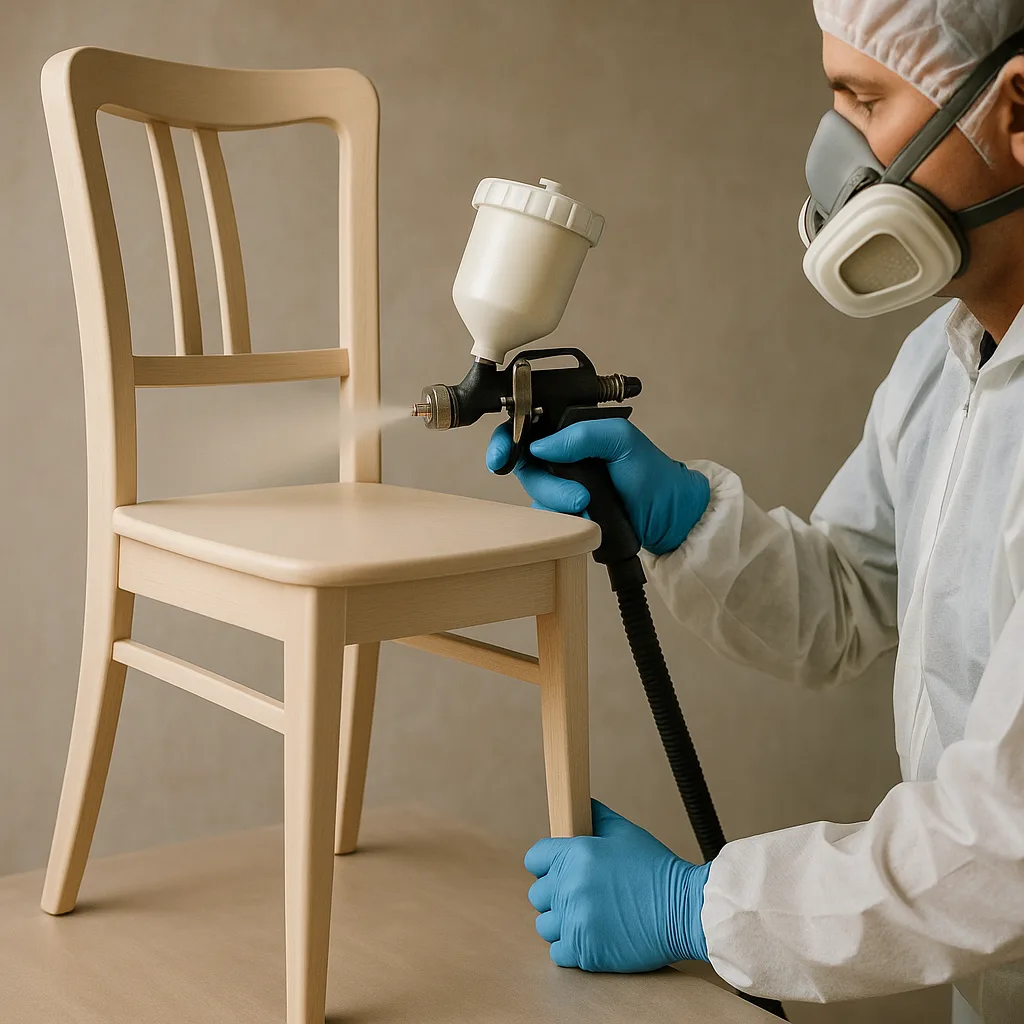
Spray Painting Furniture for a Smooth Finish
Spray painting furniture offers the potential for the smoothest possible finish, free of brush marks, and can be significantly faster than brushing, especially on pieces with intricate details, spindles, or woven textures (like wicker). Whether using aerosol cans or a paint sprayer (HVLP – High Volume Low Pressure, or airless), the principles are similar, focusing on preparation, environment, and technique. Learning how to spray paint furniture effectively requires practice but yields impressive results.
- Preparation is Paramount: As always, clean and sand (or use appropriate no-sand methods) the furniture thoroughly. Because spray paint applies thinly, surface imperfections will be more noticeable. Fill any holes or cracks and sand smooth. Mask off any areas you don’t want painted using painter’s tape and paper or plastic sheeting. Press tape edges down firmly to prevent paint bleed.
- Set Up Your Spray Area: This is crucial for spray painting furniture. Work in a well-ventilated area, ideally outdoors on a calm, non-windy day, or in a garage with doors open. Avoid direct sunlight and extreme temperatures or humidity. Lay down large drop cloths to protect the surrounding area from overspray – it travels further than you think! Consider setting up a temporary spray shelter if working outdoors often. Elevate the furniture piece on blocks of wood or plastic containers to easily spray lower edges and legs.
- Safety First: Wear appropriate safety gear: a respirator mask designed for paint fumes (not just a dust mask), eye protection (goggles), and gloves.
- Prepare the Paint (if using a sprayer): If using an HVLP or airless sprayer, you may need to thin the paint according to the sprayer manufacturer’s instructions and the paint manufacturer’s recommendations. Use the recommended thinning agent (usually water for latex/acrylic, mineral spirits for oil-based). Strain the paint through a paint strainer to remove any clumps or debris that could clog the sprayer nozzle. Practice on cardboard to adjust the spray pattern and flow rate.
- Aerosol Can Technique: Shake the can vigorously for the time recommended on the label (usually 1-2 minutes) and periodically during use. Hold the can upright, about 6-12 inches away from the surface (check can instructions). Start spraying just *before* the edge of the piece and continue spraying just *past* the opposite edge in a steady, sweeping motion. Overlap each pass by about 50% to ensure even coverage. Keep the can moving constantly to avoid drips and runs. Apply several thin coats rather than one heavy coat.
- Paint Sprayer Technique: Similar to aerosols, maintain a consistent distance (usually 6-10 inches) and speed. Move your arm parallel to the surface, not just your wrist, to keep the distance uniform. Overlap passes by 50%. Start and stop the spray off the piece. Work systematically, spraying edges and details first, then larger flat surfaces. Apply thin, even coats.
- Multiple Coats and Drying: Allow each coat to dry completely according to the paint instructions before applying the next. Light sanding between coats with very fine sandpaper (320+ grit) after drying can enhance smoothness, especially with sprayers. Wipe clean before recoating.
- Clean Up: If using a paint sprayer, clean it immediately and thoroughly according to the manufacturer’s instructions. This is critical for maintaining the equipment. For aerosols, clear the nozzle by inverting the can and spraying until only clear propellant comes out.
Spray painting furniture takes practice, but the ultra-smooth furniture finish achievable makes it a popular choice for many furniture projects.
How to Paint Wood Furniture Flawlessly
Wood is perhaps the most common material for furniture, and learning how to paint wood furniture (or how to paint wooden furniture) involves a few specific considerations beyond general painting techniques. Understanding wood’s characteristics helps achieve a durable and beautiful finish.
- Identify the Wood/Finish: Is it solid wood, veneer, or laminate? Is it raw wood or previously finished? Raw wood will soak up paint differently than sealed wood. Knowing the starting point helps determine the prep needed.
- Thorough Prep is Key: As covered earlier, cleaning and sanding are vital for wood. Sanding opens the wood grain slightly, allowing primer and paint to penetrate and bond securely. Pay attention to the direction of the wood grain when sanding and painting.
- Dealing with Knots and Bleed-Through: Some woods, particularly pine and knotty woods, contain tannins or resins that can bleed through layers of paint over time, causing yellowish or brownish stains. To prevent this, after cleaning and sanding, apply a stain-blocking primer specifically designed to seal knots and tannins. Shellac-based primers (like BIN) are excellent for this but require good ventilation and specific cleanup (denatured alcohol). Water-based stain-blocking primers are also available and offer easier cleanup. Apply one or two coats over knots and any stained areas, or prime the entire piece if bleed-through is a concern or if painting a light color over dark wood.
- Priming: Even if not dealing with knots, priming wood furniture is generally recommended. A good quality primer (stain-blocking if needed, otherwise a standard wood primer) provides a uniform surface for the paint, improves adhesion, enhances paint coverage (meaning potentially fewer topcoats), and helps achieve a richer final color. Apply one or two coats of primer, sanding lightly between coats (after drying) with fine-grit sandpaper for maximum smoothness.
- Grain Filling (Optional): Woods with prominent open grain, like oak or mahogany, can sometimes show grain texture even after painting. If you desire an ultra-smooth, glass-like finish, you might consider using a grain filler before priming. This product is worked into the wood grain to level the surface. It adds extra steps and time but can significantly affect the final look.
- Painting Technique: Use the brushing or spraying techniques described previously. Apply thin, even coats, following the direction of the wood grain. Allow adequate drying time between coats.
- Top Coat for Durability: Wood furniture, especially pieces that see regular use (tables, chairs, dressers), benefits greatly from a protective top coat over the paint. Water-based polycrylics are popular choices as they are durable, non-yellowing, and have low odor. Apply 2-3 thin coats, sanding lightly with very fine sandpaper (320+ grit) between coats (after drying) for a smooth, durable furniture finish. Wax can also be used, offering a softer sheen but generally less protection than polycrylic, requiring occasional reapplication.
Following these steps specific to painting wood furniture will ensure your painted furniture not only looks fantastic but also lasts for years. This is a cornerstone of successful furniture refinishing and furniture restoration projects that involve paint.
how to paint furniture
Having covered the foundational aspects of preparation, paint selection, and core application techniques, we now delve deeper into the creative and specialized facets of how to paint furniture. This section explores advanced furniture painting techniques that add character and unique style, such as creating aged effects or light, airy finishes. We’ll also tackle specific furniture projects, providing guidance for common items like kitchen pieces and metal furniture, and offer insights into reviving older items through furniture restoration principles integrated with painting. Mastering these elements allows for truly personalized and sophisticated furniture makeovers.
Advanced Furniture Painting Techniques
Once you’re comfortable with the basics of furniture painting, you can start experimenting with techniques that add depth, character, and unique style to your pieces. These methods go beyond a simple solid color, allowing you to replicate vintage aesthetics, create textural interest, or achieve specific decorative effects. Learning advanced painting techniques for furniture like distressing and whitewashing can elevate your diy furniture projects from simple updates to statement pieces. These techniques are often sought after by those looking for furniture paint ideas that offer more personality.
How to Distress Furniture for a Vintage Look
Distressing is a popular technique used to make painted furniture look aged and worn, as if it has naturally acquired character over many years. It’s particularly effective for farmhouse, shabby chic, rustic, or industrial styles. Learning how to distress furniture involves strategically removing small amounts of paint to reveal the underlying wood or a previous paint layer. The key is to make the distressing look natural, focusing on areas where wear would typically occur: edges, corners, raised details, and around hardware. Knowing how to paint furniture to look distressed adds a valuable skill to your furniture diy repertoire.
Distressing Furniture Methods
There are several ways to achieve a distressed look, each yielding slightly different results. Here are some common distressing furniture methods:
- Sandpaper Distressing (Dry Distressing): This is the most common method. After your final coat of paint is completely dry, use medium-grit (e.g., 100-150) or fine-grit (e.g., 220) sandpaper or a sanding block. Gently rub the areas you want to distress. Start lightly – you can always sand more aggressively. Focus on edges, corners, raised carvings, and perhaps simulate some wear on flat surfaces where hands or objects might frequently rub. Vary the pressure and the amount of paint removed for a more authentic look. Wipe away sanding dust thoroughly. This method creates relatively crisp edges where the paint is removed.
- Wet Distressing: This technique works particularly well with chalk paint or milk paint while it’s still relatively fresh (typically within a few hours to a day of drying, check paint instructions). Dampen a lint-free cloth or sponge (squeeze out excess water). Gently rub the areas you want to distress. The moisture softens the paint, allowing you to wipe it away gradually. This method often creates a softer, more blended distressed effect compared to sandpaper. Have a dry cloth handy to wipe away the removed paint sludge.
- Wax Resist Method: This technique creates a chippy paint look and involves applying wax *before* painting. After your base coat (either primer or the first paint color you want to show through) is dry, rub a wax candle or furniture wax puck onto the areas where you want the paint to resist adhering (again, focus on edges and details). Then, paint your top coat color over the entire piece, including the waxed areas. Once the top coat is dry, gently scrape or sand over the waxed spots. The top coat of paint will easily flake or chip off in those areas, revealing the layer underneath.
- Layered Paint Distressing: For a more complex aged look, apply two different colors of paint. Paint the entire piece with your base color (the color you want to peek through) and let it dry completely. Then, apply the wax resist method (optional, for chippiness) or simply paint your top color directly over the base color. Once the top coat is dry, use sandpaper or wet distressing to remove the top layer in desired spots, revealing hints of the base color underneath. This adds depth and visual interest.
- Dry Brushing: While not strictly distressing, dry brushing can contribute to an aged look. Dip the very tips of your brush bristles into the paint, then wipe almost all of it off onto a paper towel. Lightly skim the brush over the surface, especially on raised details or edges. This deposits just a hint of color, creating highlights and a weathered appearance. It can be done with the main color for texture or a contrasting color (like white over dark paint, or vice versa) for aging.
Experimenting with these distressing furniture methods on scrap wood first is always a good idea to understand the effect each produces before tackling your main furniture project.
Whitewashing Furniture Technique Explained
Whitewashing furniture is a technique used to give wood a light, weathered, coastal, or rustic look while still allowing the natural wood grain to show through. Unlike opaque painting, whitewashing creates a semi-transparent finish. Learning how to whitewash furniture is relatively simple and can dramatically transform dark or dated wood pieces. This technique falls under the umbrella of staining furniture in a sense, but uses diluted paint instead of traditional stain.
The Process:
- Preparation: As always, start with clean furniture. For whitewashing, sanding is usually essential. You need to sand the piece down to raw wood or a very well-scuffed existing finish for the whitewash to penetrate or adhere properly. If sanding down to raw wood, start with medium-grit sandpaper to remove the old finish and finish with fine-grit sandpaper for smoothness. Wipe away all sanding dust meticulously.
- Mix the Whitewash: Create your whitewash solution by diluting white paint with water. Latex paint (flat or matte sheen preferred) or chalk paint works well. The ratio depends on how transparent you want the finish. Start with a 1:1 ratio (one part paint to one part water) and test it on an inconspicuous area or scrap wood. Adjust the ratio as needed – more water for a more transparent look, less water (e.g., 2 parts paint to 1 part water) for a more opaque look. Stir the mixture thoroughly.
- Application: Apply the whitewash mixture to the wood using a brush, sponge, or lint-free cloth. Work in manageable sections, applying the wash in the direction of the wood grain.
- Wipe Back: This is the crucial step. Let the wash sit on the wood for a short time (anywhere from 30 seconds to a few minutes, depending on the desired effect and how quickly the wood absorbs it – test first!). Then, use a clean, dry, lint-free cloth to wipe away the excess wash, again moving in the direction of the wood grain. The amount you wipe back determines how much wood grain shows through. Wipe more for a subtle effect, less for a whiter finish. Ensure you wipe evenly to avoid blotchiness.
- Drying and Sealing: Let the whitewashed piece dry completely. Because whitewash is thin, it usually dries relatively quickly. Once dry, you can apply a second coat if you want a whiter look, repeating the application and wiping process. Because whitewashing leaves a thin layer of paint and often exposes some raw wood, sealing is highly recommended for protection. Apply a clear top coat, preferably water-based polycrylic in a matte or satin finish to maintain the whitewashed aesthetic without yellowing. Apply 2-3 thin coats according to the manufacturer’s instructions.
Whitewashing furniture is a fantastic technique for achieving a light, airy feel and is a great option within furniture refinishing when you want to lighten wood without completely hiding its natural beauty. It’s a key technique in the upcycling furniture toolkit.
Specific Furniture Painting Projects
While the general principles of how to paint furniture apply broadly, certain types of furniture present unique challenges or require specific considerations due to their materials or intended use. Addressing these nuances ensures a successful and durable outcome for your furniture projects. Here, we’ll focus on practical advice for how to paint kitchen furniture, tackling metal furniture, and breathing new life into cherished heirlooms or thrift-store finds by learning how to paint old furniture, including some basics of furniture restoration.
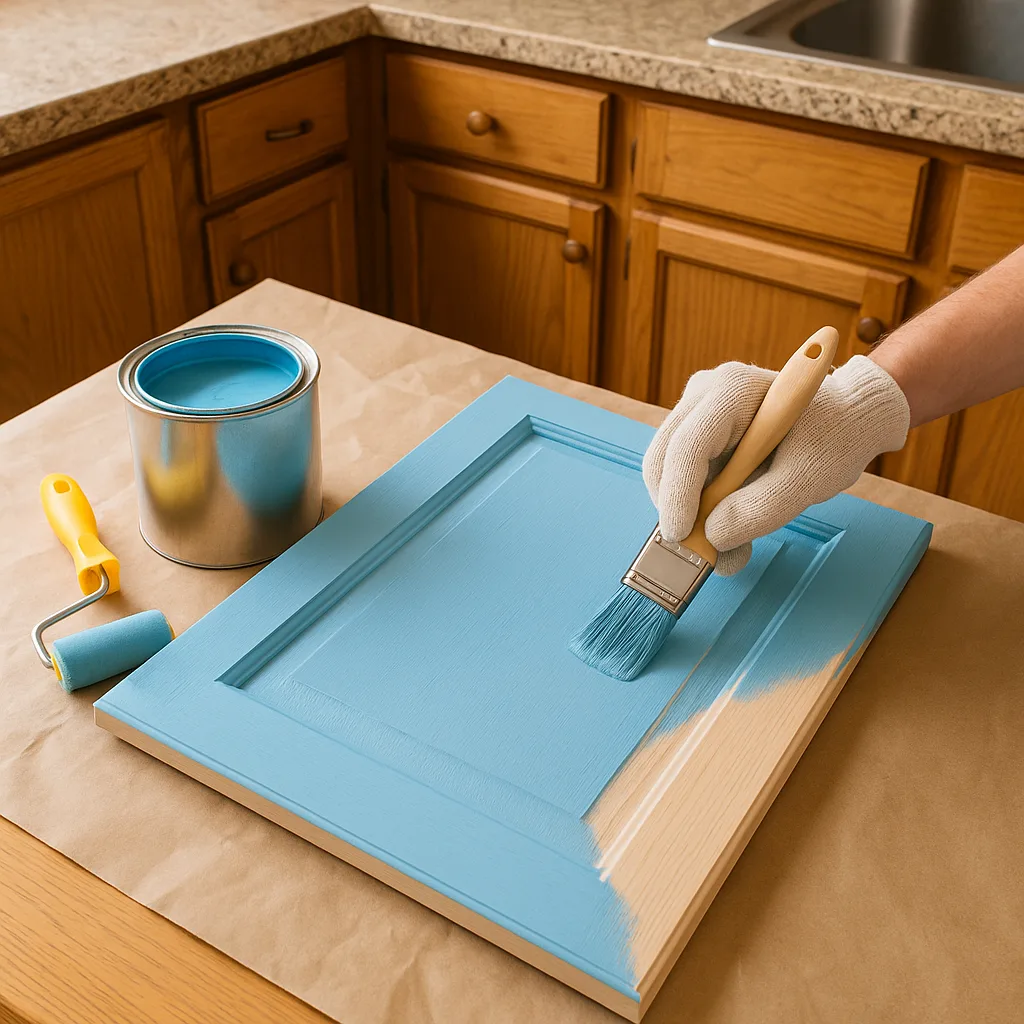
How to Paint Kitchen Furniture
Kitchen furniture, particularly cabinets and tables, endures significant daily wear and tear, exposure to grease, moisture, and frequent cleaning. Therefore, durability and cleanability are top priorities when learning how to paint kitchen furniture. The preparation and product selection are even more critical here than for a decorative piece in a living room.
- Extreme Cleaning: Kitchen surfaces accumulate grease and grime like nowhere else. Use a powerful degreaser (like TSP or a dedicated kitchen cabinet cleaner) and scrub thoroughly. Pay extra attention to areas around the stove, sink, and knobs/handles. Rinse meticulously and let dry completely, which might take 24 hours or more, especially in crevices.
- Meticulous Sanding: Unless using a specialized bonding primer system designed for cabinets, sanding is highly recommended for kitchen furniture. You need to remove any gloss and create a good profile for adhesion. For cabinets, removing doors and drawers makes the process much easier. Label them so you know where they go back! Sand all surfaces – fronts, backs, edges, and the cabinet frames. Use medium-grit followed by fine-grit sandpaper.
- Priming is Essential: Use a high-quality primer, preferably one known for adhesion and stain blocking. For cabinets, an oil-based or shellac-based primer often offers superior adhesion and blocking, but water-based bonding primers specifically designed for cabinets are also excellent and offer easier cleanup. Priming ensures the topcoat adheres well and prevents potential bleed-through from wood tannins or old finishes.
- Choose Durable Paint: This is not the place for standard flat latex wall paint or unsealed chalk paint. Opt for paints specifically designed for cabinets and furniture, known for their hard, durable finish. High-quality acrylic latex enamels or specialized cabinet paints (sometimes called hybrid enamels that offer oil-like hardness with water-based cleanup) are excellent choices. A satin or semi-gloss sheen is generally recommended for kitchen furniture as it offers better wipeability and resistance to moisture and stains compared to matte finishes.
- Application for Smoothness: Whether brushing or spraying (spray painting furniture often yields the best results for cabinets), apply thin, even coats. Allow ample drying time between coats, often longer than standard furniture paint due to the durable formulations. Lightly sand between coats with very fine sandpaper (320+ grit) for the smoothest possible finish.
- Top Coat for Extra Protection (Optional but Recommended): While many modern cabinet paints offer a durable finish on their own, applying 2-3 coats of a clear, water-based polycrylic topcoat (in a compatible sheen) can add an extra layer of protection, especially on high-wear areas like tabletops or around handles. Ensure the paint is fully cured before applying the topcoat.
- Curing Time: High-durability paints often require a longer curing time (the time it takes for the paint to reach maximum hardness) – sometimes up to 30 days. Be gentle with the newly painted surfaces during this period. Reattach doors, drawers, and hardware only after sufficient drying/curing time has passed.
Painting kitchen furniture is a more involved furniture project, but the payoff in transforming the heart of your home is immense.
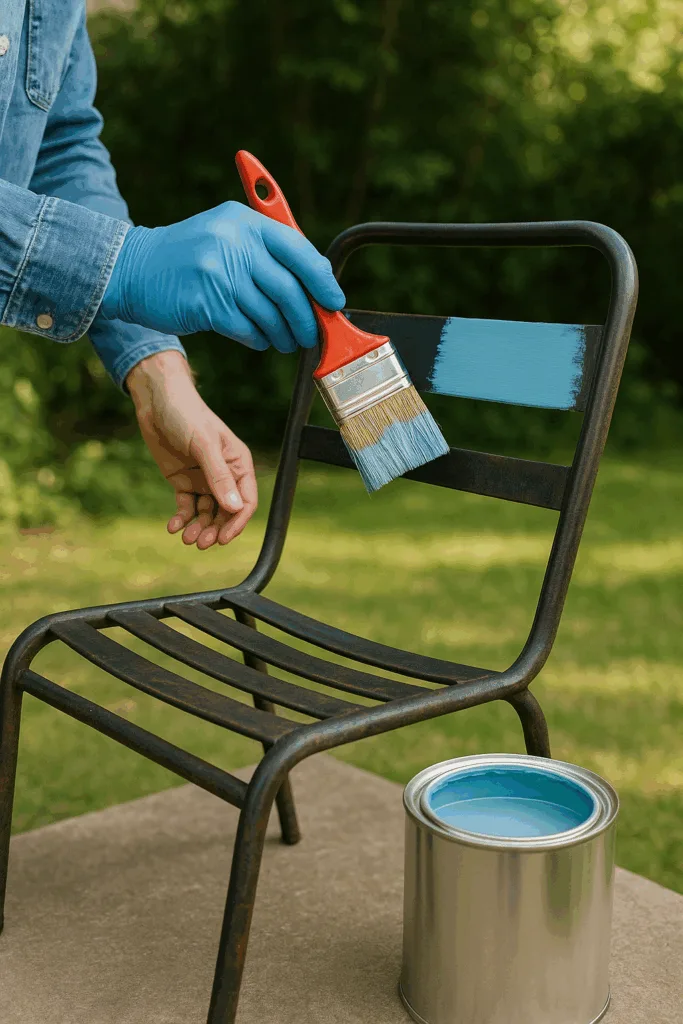
Painting Metal Furniture Guide
Metal furniture, whether indoor accent pieces or outdoor patio sets, can also be revitalized with paint. Learning how to paint metal furniture involves addressing potential rust issues and choosing paints suitable for metal surfaces.
- Cleaning: Clean the metal furniture thoroughly to remove dirt, dust, pollen (if outdoors), and any grease or grime. Mild soap and water usually suffice, but use a degreaser if necessary. Rinse well and dry completely.
- Rust Removal: This is the most critical step for ferrous metals (iron, steel) that are prone to rusting. Inspect the piece carefully. Use a wire brush (manual or attached to a drill) to remove loose, flaky rust. For heavier rust, sandpaper (medium to coarse grit) or chemical rust removers/converters might be needed. The goal is to get back to a stable surface, ideally bare metal in the rusted areas. For non-ferrous metals like aluminum, rust isn’t an issue, but you might need to address oxidation (a chalky white powder) by lightly sanding or scrubbing.
- Sanding (Scuffing): Even if there’s no rust, lightly sanding the entire piece with fine-grit sandpaper or steel wool helps the primer adhere better, especially if the metal has a smooth or previously painted surface. Wipe away all metal filings and dust with a tack cloth or a cloth slightly dampened with mineral spirits (allow to evaporate fully).
- Priming: Using the right primer is crucial for painting metal. Choose a primer specifically formulated for metal surfaces. If you removed rust, use a rust-inhibitive or rust-reforming primer on those areas or the entire piece for best protection against future rusting. Apply one or two thin coats according to the manufacturer’s instructions. Allow it to dry completely.
- Choosing Paint: Select a paint suitable for metal. Spray paints are very popular for metal furniture (spray painting furniture often provides the most even coverage on metal frames and details) and many are labeled “Direct-to-Metal” (DTM) or suitable for indoor/outdoor use. Enamel paints (either spray or brush-on) provide a hard, durable finish suitable for metal. Acrylic latex paints can also be used over a proper metal primer. Consider the furniture’s location – outdoor pieces need exterior-grade paint with UV resistance.
- Application: Apply the paint in thin, even coats, using either spray or brush techniques. Multiple thin coats are better than one thick coat to avoid drips and ensure proper drying. Allow sufficient drying time between coats.
- Top Coat (Optional): For added durability, especially for outdoor furniture exposed to the elements or high-use indoor pieces, consider applying a clear top coat compatible with your chosen paint (e.g., a clear enamel or polycrylic) once the final paint coat is fully cured.
With proper preparation, especially rust treatment, painting metal furniture is a straightforward way to update its look and protect it from the elements.
How to Paint Old Furniture
Painting old furniture often involves more than just applying a new color. These pieces might have layers of old paint, intricate details, minor (or major) damage, and a history that requires careful handling. Learning how to paint old furniture often blends furniture painting with basic furniture restoration and furniture refinishing principles.
- Assessment: Carefully examine the piece. Is it structurally sound? Are there loose joints, wobbles, or broken parts? Is the existing finish peeling, cracking, or alligatoring? Is it solid wood, veneer (which requires careful sanding), or something else? Are there signs of woodworm? Identifying these issues upfront helps plan the necessary repairs and preparation.
- Repairs: Address structural issues before painting. Glue and clamp loose joints. Fill deep scratches, gouges, or missing veneer pieces with wood filler or epoxy putty specifically designed for wood repair. Sand the repairs smooth once cured. Ensure drawers slide smoothly and doors close properly. Addressing these issues falls under furniture restoration.
- Cleaning: Old furniture can be particularly grimy. Clean thoroughly using methods described earlier, paying attention to intricate carvings or hardware recesses.
- Stripping vs. Sanding: If the existing finish is heavily damaged, peeling, or cracking, simply painting over it won’t yield good results. You may need to remove the old finish. This can be done by extensive sanding (messy and potentially damaging to details or veneer) or by using chemical paint strippers. Stripping is often preferred for multiple layers or intricate pieces but requires safety precautions (ventilation, gloves, eye protection) and careful work. Follow stripper instructions precisely. After stripping, the piece usually needs cleaning/neutralizing and light sanding. If the existing finish is stable, thorough cleaning and sanding (as described in the general prep section) might suffice.
- Priming: Given the age and unknown history of the finish, using a stain-blocking primer is highly recommended for old furniture to prevent bleed-through from old stains, tannins, or previous finishes.
- Painting and Finishing: Proceed with your chosen furniture paint and techniques (brush, spray, chalk paint, etc.). Consider techniques like distressing furniture or whitewashing furniture which often complement the character of older pieces. Apply a durable top coat to protect your work.
- Hardware: Clean the original hardware if it suits the new look, or replace it with new knobs or pulls that complement the updated style. This small change can significantly impact the final furniture makeover.
Painting old furniture is a rewarding upcycling furniture project, preserving history while giving it a fresh lease on life. It requires patience and careful prep work.
Furniture Restoration Basics
While this guide focuses on how to paint furniture, sometimes painting is part of a larger furniture restoration effort. Basic restoration skills are invaluable when dealing with older or damaged pieces before you even pick up a paintbrush. Restoring furniture aims to bring a piece back to a good condition, addressing both functional and aesthetic issues.
Key basic restoration steps often needed before painting include:
- Structural Repairs: Fixing wobbly legs (often requires cleaning old glue from joints and re-gluing with wood glue, using clamps to hold until dry), reinforcing loose frames, or replacing missing support blocks.
- Surface Repairs: Filling cracks, gouges, and deep scratches using wood filler or epoxy putty. Choose a filler that is sandable and paintable. For larger missing chunks or veneer damage, more advanced techniques might be needed, but basic fills are manageable for DIYers.
- Drawer/Door Adjustments: Ensuring drawers slide smoothly (sanding runners, applying wax) and doors hang correctly (adjusting hinges, planing edges if sticking).
- Hardware Issues: Tightening loose hardware, cleaning original hardware, or preparing surfaces for new hardware (filling old holes if the new hardware has different spacing).
- Basic Cleaning/Stripping: As discussed, sometimes removing a failing finish is a necessary restoration step before repainting or refinishing furniture.
Learning these basic furniture restoration techniques enhances your ability to tackle a wider range of furniture projects and ensures the pieces you paint are not only beautiful but also functional and sound. It bridges the gap between a simple furniture makeover and true furniture refinishing or restoration.
Furniture Finishing and Protection
You’ve meticulously prepped, carefully painted, and perhaps even added some advanced decorative touches. But the job isn’t quite finished yet! Applying a protective top coat is a crucial final step in most furniture painting projects, especially for pieces that will see regular use. This seals the paint, enhances durability, protects against scratches, scuffs, and moisture, and influences the final sheen and feel of the piece. Understanding how to properly apply sealants helps you achieve the perfect, long-lasting furniture finish.
Applying Top Coats to Painted Furniture
Choosing and applying the right top coat (also called a sealant or varnish) protects your hard work and ensures your painted furniture withstands daily life. There are several options available, each with its own characteristics:
- Water-Based Polycrylic: This is one of the most popular choices for sealing painted furniture. It’s water-based, meaning low odor and easy cleanup with soap and water. It dries clear and is non-yellowing, making it ideal over light or white paint colors (how to paint furniture white projects benefit greatly). Polycrylic is durable, water-resistant, and available in various sheens (matte, satin, semi-gloss, gloss). Apply it with a high-quality synthetic brush, foam brush, or sprayer in thin, even coats. Avoid over-brushing, as this can create bubbles. Typically, 2-3 coats are recommended for good protection, lightly sanding with very fine sandpaper (320-400 grit) between coats (after fully dry) for maximum smoothness.
- Furniture Wax: Traditionally used over chalk paint and milk paint, furniture wax provides a soft, velvety sheen and a smooth feel. It’s typically applied with a wax brush or lint-free cloth, worked into the paint, and then buffed after a short drying time to achieve the desired luster. Wax offers moderate protection against moisture and scuffs but is generally less durable than polycrylic, especially against heat and standing liquids. It may require reapplication periodically (e.g., annually) on high-use surfaces. Wax is available in clear, dark (for an aged look), and various colors. It’s generally easy to apply but requires more curing time to reach full hardness.
- Oil-Based Polyurethane: This offers excellent durability and heat/water resistance. However, it tends to have a strong odor during application, requires mineral spirits for cleanup, and can amber (yellow) slightly over time. This ambering effect might be undesirable over white or light colors but can add warmth to darker colors or wood tones. Apply with a natural bristle brush in thin coats, sanding lightly between coats. Due to its tendency to yellow and the stronger fumes, it’s less commonly chosen for indoor painted furniture now compared to water-based options, but remains a valid choice for high-durability needs where slight color change isn’t a concern.
- Lacquer: Lacquer provides a very hard, durable finish, often used in professional furniture manufacturing. It dries extremely quickly. However, traditional solvent-based lacquers have very strong fumes and require spraying for best results, making them less practical for most diy furniture projects. Water-based lacquers are available, offering good durability with easier application and cleanup, similar to polycrylic but sometimes marketed as harder finishes.
Application Tips for Top Coats:
- Ensure the paint is completely dry and cured according to the manufacturer’s recommendations before applying any top coat. Rushing this can cause issues.
- Work in a clean, dust-free environment to avoid particles settling into the wet top coat.
- Apply thin, even coats. Thick coats take longer to dry and are more prone to drips or cloudiness.
- Follow recommended drying times between coats religiously.
- Use the applicator recommended for the product (e.g., synthetic brush for water-based poly, natural bristle for oil-based poly, wax brush/cloth for wax).
Choosing and correctly applying a top coat is essential for protecting your furniture painting investment.
Achieving the Perfect Furniture Finish
The “perfect” furniture finish is subjective and depends on the desired look and the furniture’s use. However, achieving a high-quality finish generally involves attention to detail throughout the entire how to paint furniture process, culminating in the final surface feel and appearance.
Key factors contributing to a perfect finish:
- Surface Smoothness: This starts with meticulous prep – filling imperfections, thorough sanding, and removing all dust. Sanding lightly between coats of primer, paint, and top coat with progressively finer grits of sandpaper (e.g., 220 after primer, 320+ between paint/top coats) is the secret to an exceptionally smooth, professional-feeling surface. Always wipe away dust after sanding.
- Even Paint Application: Whether brushing or spraying, focus on applying thin, consistent coats. Avoid drips, runs, and brush marks by using proper techniques (long strokes, tipping off for brushing; consistent distance and speed for spraying).
- Appropriate Sheen Choice: The sheen of your paint and/or top coat significantly impacts the final look.
- Matte/Flat: Hides imperfections well, provides a soft, velvety look (common with chalk paint). Less washable, may show fingerprints or scuffs more easily unless well-sealed.
- Eggshell/Satin: Offer a subtle sheen, more washable and durable than matte. A very popular choice for furniture, balancing aesthetics and practicality. Often referred to as a low-lustre finish.
- Semi-Gloss: Noticeably shiny, very durable and easy to clean. Good for high-use items like kitchen cabinets or children’s furniture. Can highlight surface imperfections.
- Gloss: Highly reflective, very durable and washable. Creates a modern, sleek look or a traditional lacquered appearance. Shows every flaw in the surface preparation.
- Consistent Color: Ensure paint is well-stirred before and during application to maintain consistent color across the entire piece. Apply enough coats for full, even coverage without patchiness.
- Flawless Top Coat: Apply the chosen top coat smoothly and evenly, avoiding bubbles, drips, or streaks. Ensure it’s compatible with your paint and suitable for the furniture’s intended use. Allow it to cure fully for maximum durability.
- Clean Edges and Details: Pay attention to details. Ensure paint lines are crisp if masking, and that paint hasn’t pooled in corners or carvings.
Achieving that perfect furniture finish requires patience and diligence at every stage, from the initial cleaning to the final buff of wax or the last smooth stroke of polycrylic. It’s the culmination of all the furniture painting techniques and furniture tips discussed.
how to paint furniture
Beyond the technical steps of applying paint, the journey of how to paint furniture often extends into the realm of creativity, sustainability, and personal expression through DIY furniture projects and makeovers. This final section explores the exciting possibilities that open up once you’ve mastered the basics. We’ll delve into upcycling furniture with imaginative ideas, provide a brief guide to furniture refinishing (when painting isn’t the goal), outline the steps for restoring furniture, and offer decorating furniture tips to add those final personalized touches after the paint has dried. This is where function meets artistry in your furniture diy adventures.
DIY Furniture Projects and Makeovers
Embarking on DIY furniture projects is an empowering way to customize your living space without breaking the bank. Painting is often at the heart of these transformations, turning mundane or outdated items into unique pieces that reflect your personal style. A furniture makeover can be as simple as painting a small side table or as complex as completely overhauling a large dresser or armoire. The key is to start with manageable furniture projects to build confidence and skills. Search for “how to paint furniture ideas” or “paint furniture ideas” online to find endless inspiration for your next creation. These projects are not just about aesthetics; they promote sustainability by giving existing items a new life.
Upcycling Furniture: Creative Ideas
Upcycling furniture takes the concept of recycling a step further. Instead of just reusing an item, upcycling aims to transform waste materials or unwanted products into new items of better quality or higher environmental value. Painting is a cornerstone of upcycling furniture, but it often involves more creative additions. Learning how to upcycle furniture is about seeing potential in the old and discarded.
Creative Upcycling Ideas Beyond Basic Painting:
- Hardware Transformation: Simply changing outdated or plain knobs and pulls can dramatically alter the look of a painted piece. Consider unique options like leather pulls, crystal knobs, or modern brass handles.
- Stenciling: Add patterns, motifs, or lettering to your painted furniture using stencils. This could be on drawer fronts, tabletops, or even the sides of a piece. Metallic paints or contrasting colors work well for stenciling.
- Decoupage: Apply decorative paper (like napkins, tissue paper, wallpaper scraps, or maps) to parts of the furniture using decoupage medium (like Mod Podge). This can add intricate patterns or personalized themes, often sealed over for durability. Great for drawer liners or accent panels.
- Furniture Transfers: Rub-on transfers designed for furniture offer intricate designs (florals, script, images) that look almost hand-painted once applied over a painted surface.
- Adding Texture: Incorporate elements like beadboard panels to cabinet doors, apply textured paint finishes, or add decorative wood appliqués before painting for dimensional interest.
- Color Blocking/Geometric Designs: Use painter’s tape to create sharp lines for two-toned effects, stripes, chevrons, or other geometric patterns.
- Function Change: Upcycling can also involve altering the furniture’s function. Turn an old dresser into a bathroom vanity, a small ladder into a bookshelf, or old drawers into wall shelves – painting helps unify the new creation.
Upcycling furniture encourages creativity and resourcefulness, making each furniture diy project truly unique.
Easy DIY Furniture Projects
If you’re new to the world of how to paint furniture or furniture diy, starting with simple projects can build confidence and allow you to practice techniques without feeling overwhelmed.
Easy DIY Furniture Projects for Beginners:
- Picture Frames: Thrift stores are full of old frames. Cleaning, lightly sanding, and spray painting them a uniform color (or various coordinating colors) is a quick and satisfying project.
- Small Side Table or Nightstand: These pieces are usually manageable in size, have flat surfaces ideal for practicing brushing or spraying, and don’t require vast amounts of paint. They offer a great canvas for trying out colors or simple techniques like chalk painting furniture.
- Wooden Stool or Plant Stand: Simple structures that allow you to practice prepping, painting, and sealing on different surfaces (top, legs, rungs).
- Serving Tray: Find an old wooden tray and give it a makeover with paint, perhaps adding stenciling or decoupage to the base. Ensure you use a food-safe sealer if it will contact food directly.
- Single Chair: Painting a wooden chair (especially one without upholstery) lets you practice on spindles and curved surfaces. Start with one before tackling a whole set.
- Bookshelf (Small): A simple boxy bookshelf offers flat surfaces perfect for practicing smooth brush strokes or spray painting.
These smaller furniture projects provide excellent learning opportunities and deliver quick, rewarding results, encouraging you to tackle more ambitious furniture makeovers later.
Furniture Refinishing Guide
It’s important to distinguish furniture painting from furniture refinishing. While painting covers the existing surface with a new color, refinishing furniture typically involves stripping the old finish (paint, varnish, stain) completely down to the bare wood, repairing any damage, and then applying a new finish, which could be stain, clear coat, oil, or sometimes, paint. Paint refinishing might specifically refer to removing old paint layers before applying new paint or a different finish.
Brief Outline of the Furniture Refinishing Process (when aiming for a stained/natural wood finish):
- Stripping: Chemically removing the old finish using paint/varnish stripper. This is often necessary to get back to the bare wood evenly. Requires safety precautions.
- Cleaning/Neutralizing: Removing stripper residue according to product instructions.
- Sanding: Sanding the bare wood smooth, starting with medium grit and progressing to fine grit, to prepare for the new finish and remove any remaining old finish or stains.
- Repairs: Making any necessary wood repairs.
- Staining (Optional): Applying wood stain to color the wood while allowing the grain to show through. Staining furniture requires careful application to avoid blotchiness. Learning how to stain furniture is a skill in itself.
- Sealing/Top Coating: Applying a protective clear finish like polyurethane, lacquer, or oil to protect the wood and enhance its appearance.
Refinishing furniture to a natural wood look is often more labor-intensive than painting, especially the stripping and sanding stages. However, it’s the right choice when you want to showcase beautiful wood grain that’s hidden under an old or undesirable finish. Understanding how to refinish furniture offers an alternative approach to furniture restoration.
Restoring Furniture Steps
Restoring furniture often overlaps with both painting and refinishing but generally implies bringing a piece back to its former glory, respecting its original character while ensuring it’s functional and stable. How to restore furniture can range from minor touch-ups to extensive rebuilding. While complex restoration is a professional skill, DIYers can tackle many aspects.
General Steps in Restoring Furniture (can incorporate painting or refinishing):
- Assessment: Thoroughly inspect the piece for structural integrity, finish condition, hardware completeness, and any signs of damage (woodworm, rot, veneer issues). Research the piece if possible to understand its original style and construction.
- Cleaning: Deep clean the piece, removing decades of dirt and grime.
- Structural Repairs: Address any loose joints, wobbles, broken parts, or instabilities first. This is foundational to good restoration.
- Surface Preparation: This depends on the goal. If preserving the original finish, it might involve careful cleaning and touch-ups. If refinishing, it involves stripping and sanding. If painting (as covered extensively in this guide), it involves cleaning, sanding/deglossing, and priming.
- Finish Application: Apply the chosen finish – be it restoring the original patina, applying new stain and clear coat, or painting using appropriate furniture painting techniques.
- Hardware Restoration/Replacement: Clean and polish original hardware if possible and appropriate. If hardware is missing or damaged beyond repair, find period-appropriate replacements.
- Final Touches: Waxing, polishing, adjusting drawers/doors for smooth operation.
Restoring furniture requires patience and often a combination of woodworking, finishing, and painting skills. It’s about balancing preservation with necessary repairs and updates.
Decorating Furniture Tips Post-Painting
Once your main furniture painting work is done and sealed, adding final decorative touches can elevate the piece further and integrate it seamlessly into your decor. These decorating furniture tips provide the finishing flourish to your furniture makeover.
- Hardware: As mentioned in upcycling, the right hardware acts like jewelry for furniture. Choose knobs, pulls, or handles that complement both the furniture’s style and the new paint color. Don’t be afraid to mix metals or styles for an eclectic look.
- Lining Drawers/Cabinets: Apply attractive wallpaper, fabric, or gift wrap to the inside of drawers or cabinets using spray adhesive or decoupage medium. It’s a pleasant surprise when opened and protects the interior.
- Highlighting Details: Use metallic waxes (gold, silver, copper) or a contrasting paint color applied sparingly with a small artist’s brush or cloth to highlight carvings, mouldings, or edges after the main paint job is dry.
- Staging: How you style the furniture in your room matters. Place complementary decor items on or around the painted piece – a lamp, vase, books, or artwork that picks up on the new color or enhances its style.
- Coordinate with Textiles: Ensure the new furniture color works with existing rugs, curtains, and cushions in the room, or use the furniture makeover as an opportunity to update some textiles as well.
- Add Legs/Feet: For simple pieces like cube storage or basic cabinets, adding stylish legs (tapered wooden legs for mid-century modern, metal hairpin legs for industrial) can completely change their character after painting.
- Distressing/Aging (Subtle): Even if you didn’t do heavy distressing, a tiny bit of subtle sanding on edges or application of dark wax can add depth and prevent a piece from looking too “brand new” if that’s not the desired effect.
These final furniture tips focus on personalization and presentation, ensuring your beautifully painted furniture truly shines in its new role. Learning how to decorate furniture post-painting is the final step in mastering the art of the furniture makeover.